


The problem
Images are an integral part of many websites’ user experience, but storing and serving images can be a deceptively challenging problem. If you store your images on a server filesystem, the server and codebase need to be optimized for rapid file reads. If you store your images in a database, space can rapidly become an issue.
What’s more, if you try to send images to the UI via the standard “data on the wire” approach used for most UI-server data exchanges, you likely have to deal with image encoding, are going to load up your server bandwidth, and will find that the UI can rapidly slow down as it decodes and loads all of the images being sent. Surely there must be a better way.
The solution
Enter the CDN: your handy dandy globe-spanning network of servers whose whole job is to serve files rapidly. If you would like to learn more about CDNs, Cloudflare has an excellent overview, and SolarWinds as a great practical explainer of CDN considerations. Cloudflare also has an awesome CDN, but we won’t be talking about their CDN today.
Today we will go through the process of setting up a Google Cloud CDN. We are using Google’s CDN for several reasons.
- They consistently have a 10% faster response time than Amazon or Cloudflare, both of which are blazing fast already.
- Their CDN is part of a larger ecosystem of web hosting tools which you may already be using.
- If you aren’t using any Google Cloud products, they are currently offering a $300 credit to entice you to start.
- Frankly, their documentation is inscrutable, their UI is clean but infuriatingly vague at times, and I had a hard time finding any good resources for this process. So this seems like a good opportunity to help people navigate their system.
Let’s dive in!
Create an account
First let’s set up a Google Cloud account. If you have already done this, move on to the next step.
- Go to the Google Cloud Dashboard page and sign in.
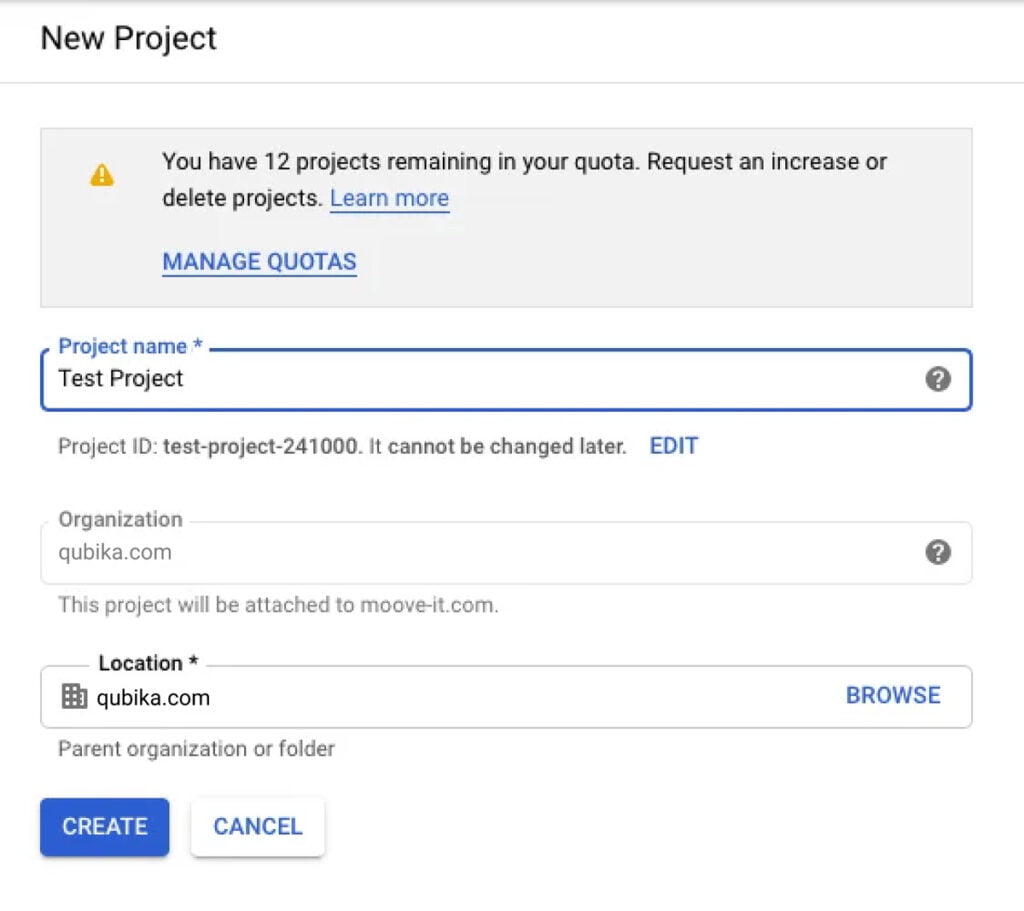
- Once the dashboard loads, you’ll be greeted by a lovely message telling you to create a project

- Click the “CREATE” button and go through the creation form.
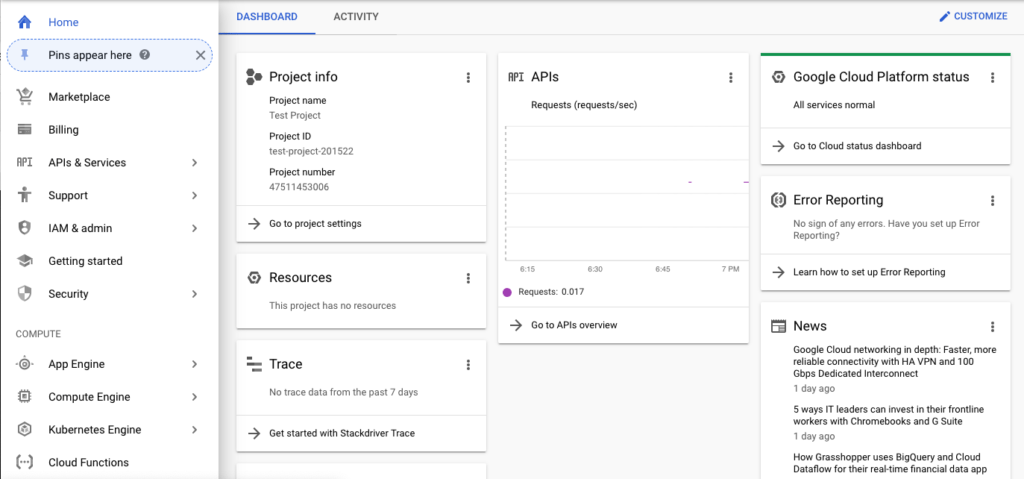
- Upon completion, you’ll be greeted by a fairly cacophonous dashboard showing you a whole lot of nothing:
- Save that money! Check out the free $300 voucher offer at the top of the page. Sign up for it. That’s a lot of moolah! If you don’t do this, you will still need to set up billing before you can continue.
Set up a load balancer – Getting started
Google handles a lot of network management for you. This is a blessing and a curse, because the purpose of some of the abstractions they’ve created can be unclear.
- On the menu on the left side of the screen, under the Networking section, click “Network Services.”
- You may see a message that the Compute Engine is getting ready. This is because you just set up a billing mechanism for your account, so they are now spinning up the infrastructure for their services.
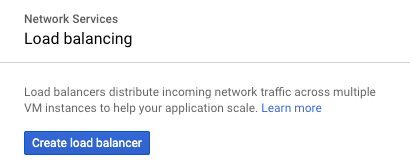
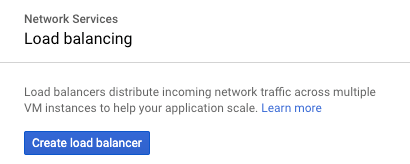
- Once the message disappears, you should see a prompt to create a Load Balancer:
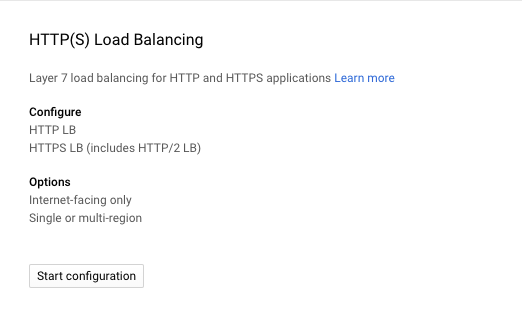
- Select your desired load balancer. We will be using the “HTTP(S) Load Balancing” option because we will eventually display our images in our app via <img> tags that point to files stored in our CDN.
You now need to do 4 things to create your load balancer: give your load balancer a name, create a backend, create host/path mappings, and create a frontend.
Set up a load balancer – Name
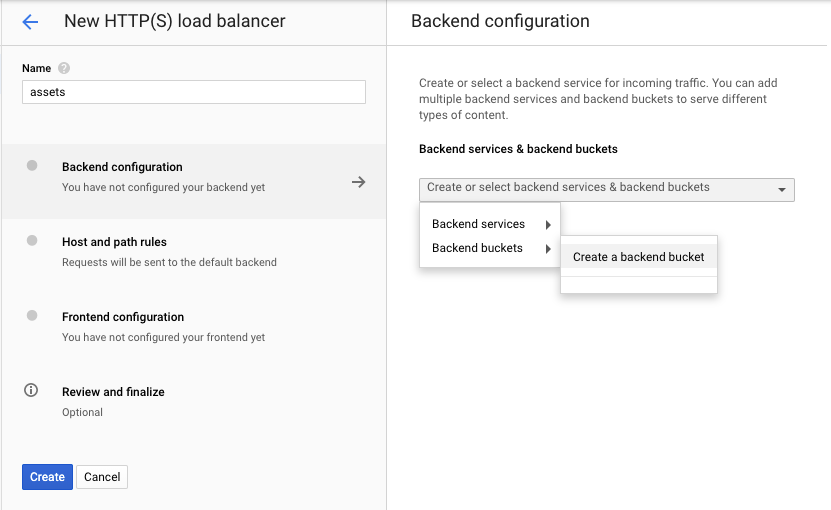
Make the name whatever you want – I will simply name mine “assets.”
Set up a load balancer – Create a backend
The backend will be our bucket where we dump our image files.
- First, select the “Create a backend bucket” option
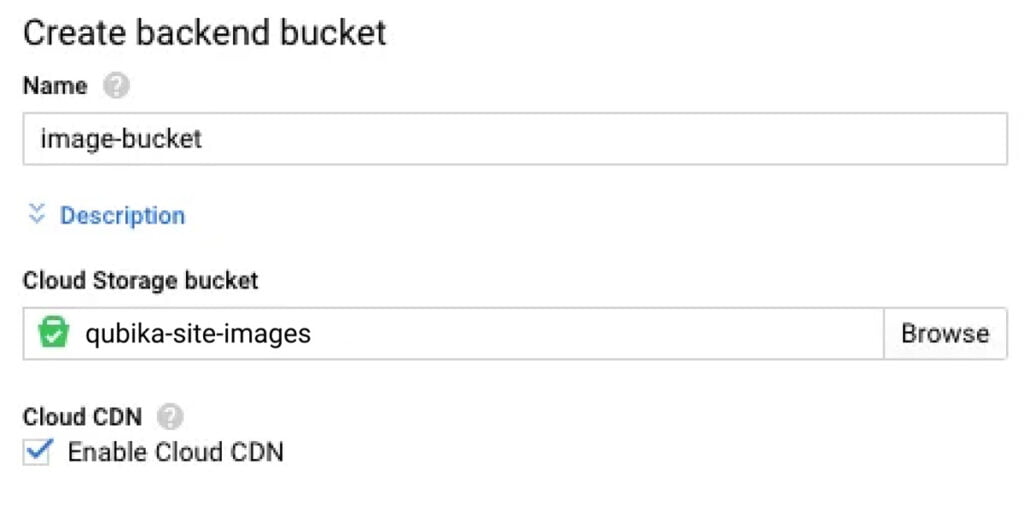
- On the form that appears, give your bucket a name and then click the “Browse” button under “Cloud Storage Bucket.”
- On the form that appears, click the icon to create a new bucket. Yes, this is slightly confusing. You are creating a bucket which will then be assigned to… a bucket. Their terminology is a bit muddy here. As far as I can tell the parent bucket is itself just a collection of globally-uniquely-named buckets.
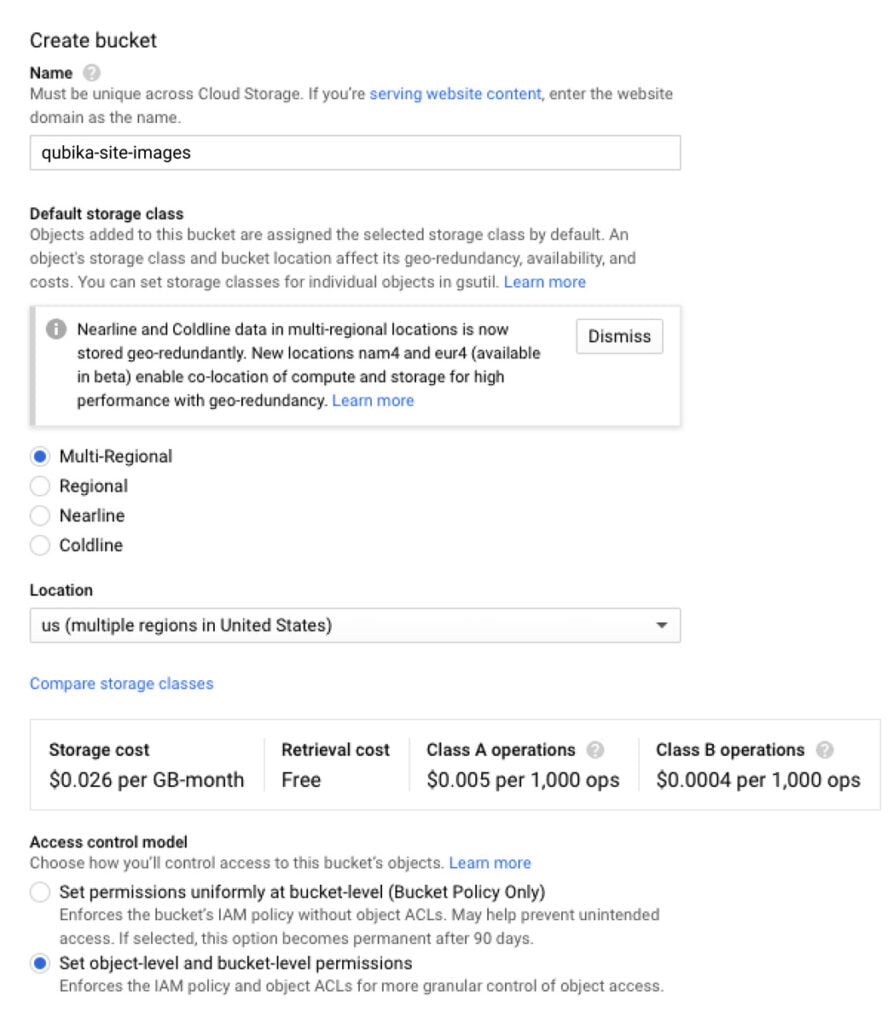
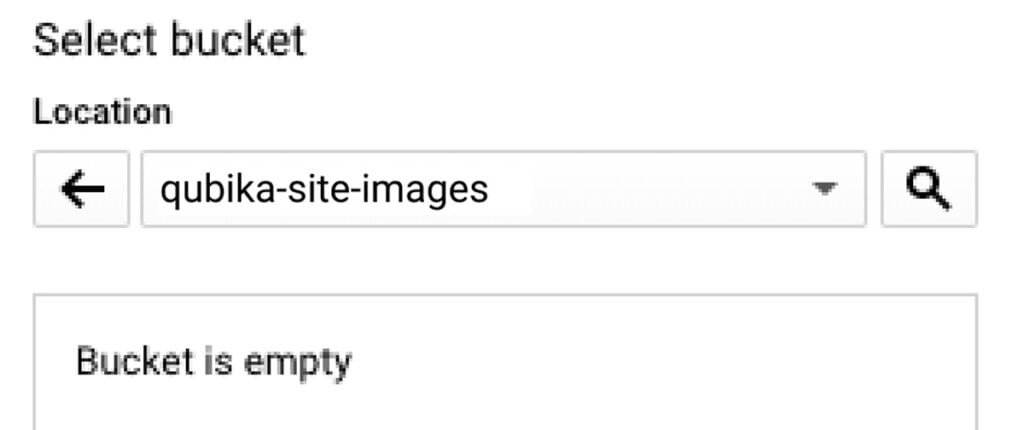
- Yet another form will appear – we are basically at Inception-levels of nested forms at this point. Let’s keep it simple. Give your bucket a name that is totally unique – as in, nobody else in the world can have the same name. I will call mine “qubika-site-images”, and keep all other settings the same because they are fine for our needs, not to mention cheap! Note the “Access control model” setting at the bottom. Feel free to check bucket-level or object-level permissions based on how you will be using this CDN. Bucket-level is more simple, so that may be your best bet.
- Once created, you will go up one level to the parent form. Select your new bucket at the top of the form, then click the “Select” button at the bottom of the screen.
- Once selected, you’ll now be nearly free of this nested form madness. Make sure you check the “Enable Cloud CDN” button. To quote Google – “Cloud CDN caches HTTP(S) content closer to your users so content delivery is faster while also reducing serving costs.” – why wouldn’t you do it? Once you’ve done this, click the “Create” button to escape.
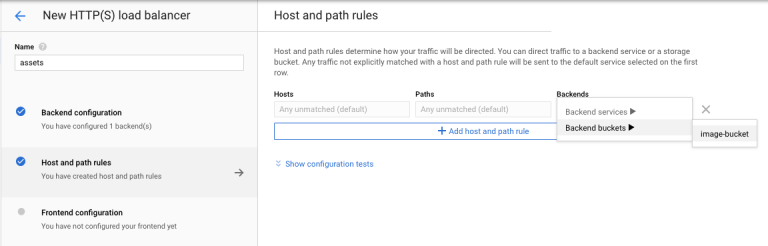
Set up a load balancer – Host/Path mappings
The host and path are the components of URLs that map to your various backends. For our purposes we are going to keep it simple and map all traffic to our “image-bucket” backend. The UI should have auto-selected your new “image-bucket” backend automatically. If it didn’t do so now.
Set up a load balancer – Create a frontend
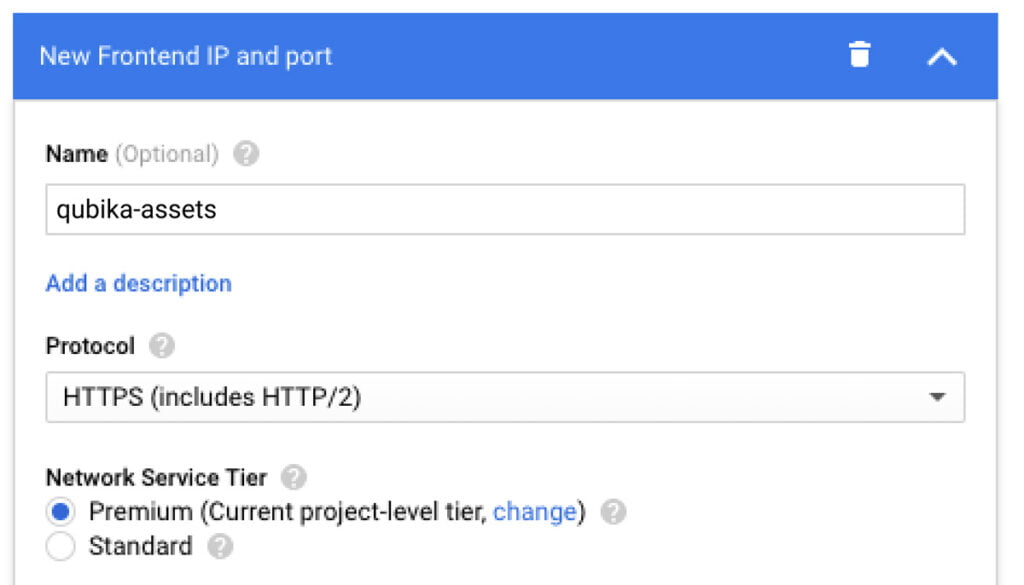
The frontend is the portion of the load balancer that faces the outside world. It consists of an IP address and SSL cert.
- Begin filling out the frontend creation form with the following info. Name it whatever you want.
- Get a static IP address – we will add this IP address to an A record in our DNS configuration a little bit later. Name it whatever you want.
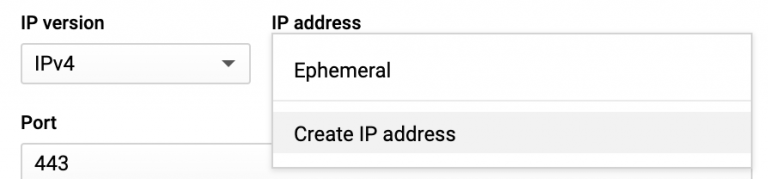
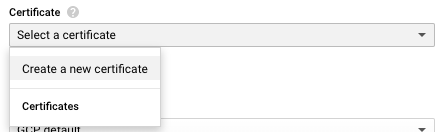
- Under the “Certificate” section, create a new certificate
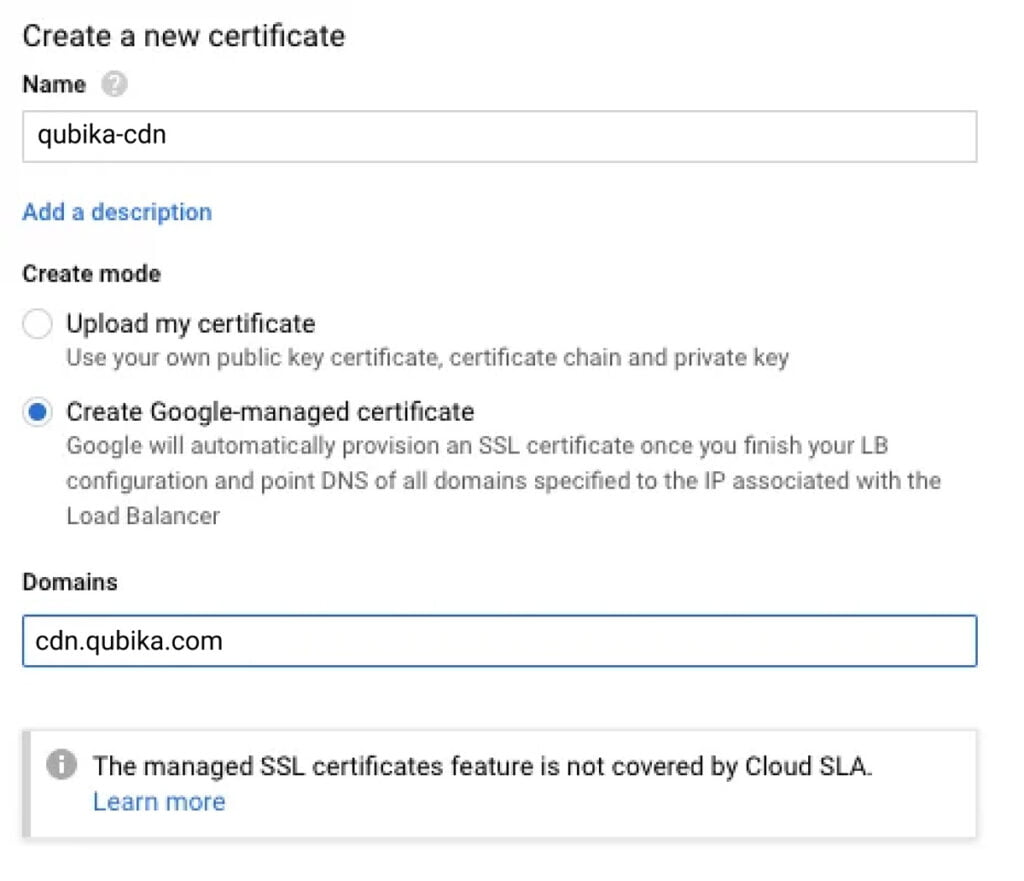
- Time for another nested form! On this form, make sure to give your certificate a descriptive name, and just let Google handle the rest with the “Create Google-managed certificate” option. It’s free and easy, so why not? Lastly, make sure the domain you point to exactly matches the domain you will be setting in you is one you have access to.
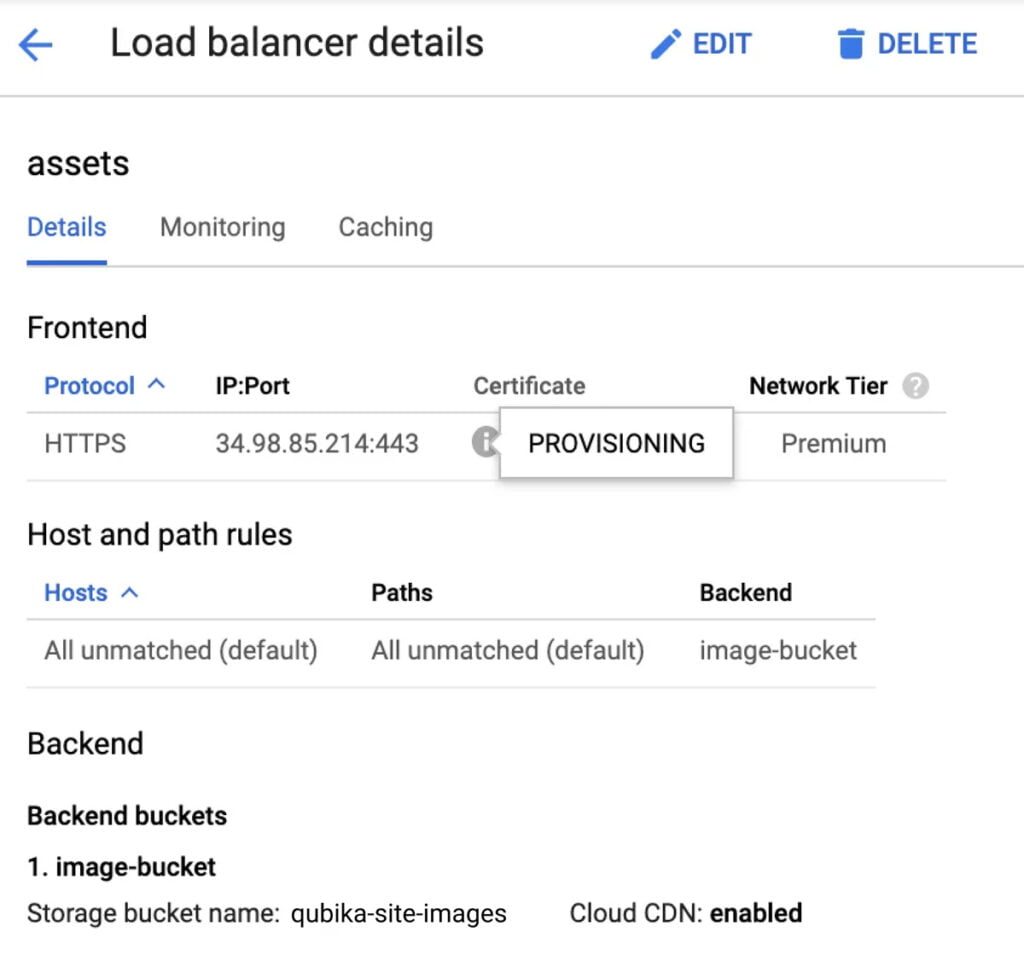
- Your completed frontend should look something like this. Click “Done”:
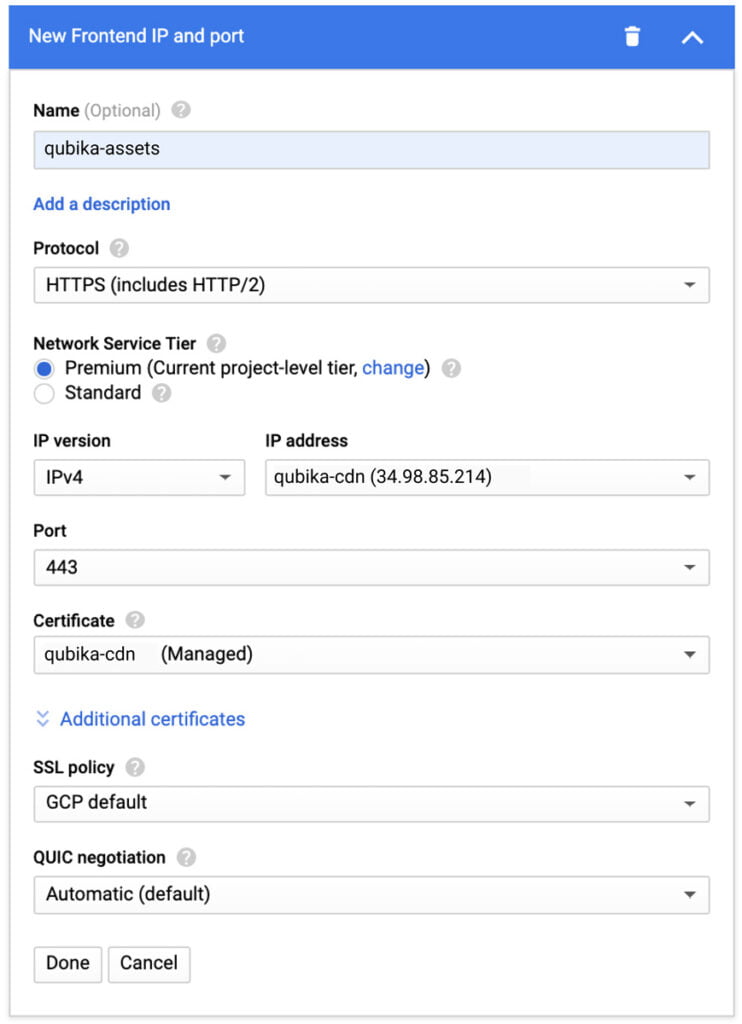
- Before we move on, let’s add our new static IP address to an A record in our DNS configuration. If we do not do this, the certificate we created will fail as it gets provisioned because it will not have a valid record that it corresponds to. The process for doing this will vary based on who is hosting your domain. The important things to ensure are that the domain specified exactly matches the domain you specified for the SSL cert (“cdn.qubika.com” in our case), and that the IP address exactly matches the new static IP address we created (“34.98.85.214” in our case).
- With that done, go back to the Google Cloud UI and click the “Create” button. It will take a moment to create the configuration. Once complete, wait for your SSL cert to get provisioned. You can check its status by hovering over its info icon as you can see below.
Store files on your CDN
You can transfer files to your new bucket via the gsutil that Google provides, or do so directly through their UI. Let’s do the latter.
- On the main menu shade on the left of the screen, go to “Storage” > “Browser.”
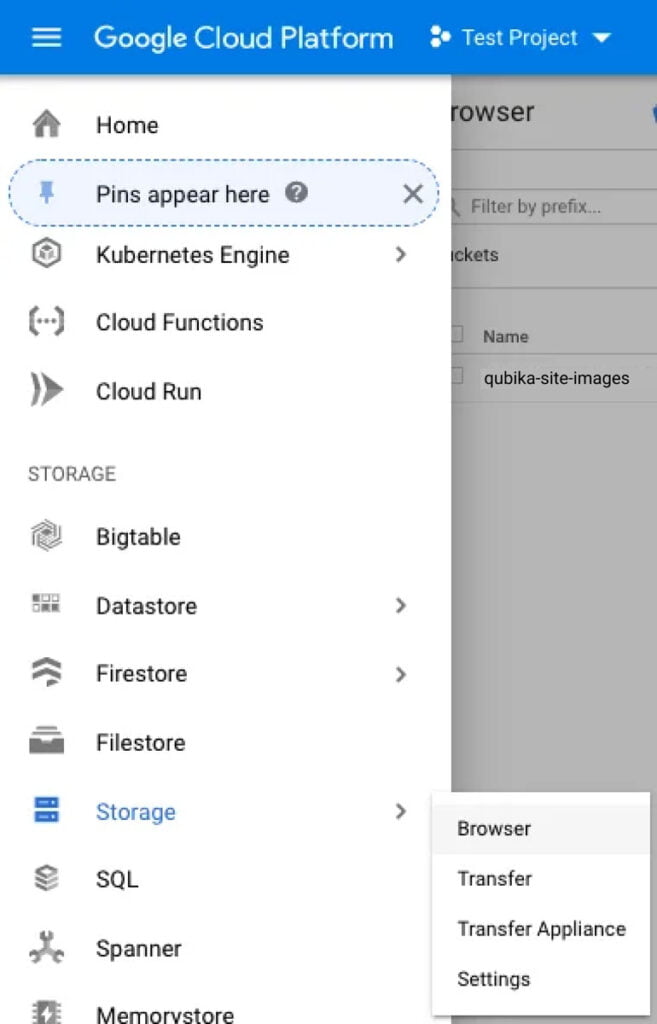
- Select your new bucket from the list that appears.
- Click the “Upload files” button and pick your files. The folder structure and names of files you upload will correspond directly to the paths you use in the URLs that point to your CDN content.
- Now we need to make the files public. You can do this by following Google’s documentation – specifically the “Making groups of objects publicly readable” section on the bottom half of the page.
View your files!
Wait for the status of your certificate to be “VALID” – once it is you can see your files by visiting your.cdn.domain/path/to/file.jpg.
Wrapping up
Now that you have a CDN for serving images (and anything else you want) you can do some pretty neat stuff like send images in emails without having to attach those images and load multiple images in parallel in your UIs via <img> tags. Next steps could include creating a Node service to manage writing files to your CDN via Google’s gsutil npm package, too!
Here at Qubika we love building elegant, maintainable, scalable software, which requires mastering an ever-changing set of technologies. CDNs are far from the only technology we need to understand, but they are an important one. I hope that this walkthrough helped you become a little more conversant in Google Cloud’s vernacular and UI, as well as the concepts underpinning CDNs.
If you’re a developer looking for an exciting new opportunity to do varied work at a company that values learning and growing, or are someone searching for a team of passionate developers to help turn your vision into a reality, you know where to find us.
Until next time!
Sources
- https://www.cloudflare.com/learning/cdn/what-is-a-cdn/
- https://www.pingdom.com/blog/benchmarking-cdns-cloudfront-cloudflare-fastly-and-google-cloud/
- https://www.cdnperf.com/cdn-compare?type=performance&location=world&cdn=aws-cloudfront-cdn,cloudflare-cdn,google-cloud-cdn
- https://console.cloud.google.com/home/dashboard
- https://cloud.google.com/storage/docs/access-control/making-data-public
- https://github.com/googleapis/nodejs-storage