Introduction
Video production has evolved dramatically over the years. In its early days, it depended on specialized software that required technical expertise and sometimes powerful hardware. Editing was a meticulous, time-consuming process, involving layer-by-layer adjustments and repetitive tasks to refine elements like text overlays, transitions, and effects. While these tools were groundbreaking at the time, they were often inaccessible to many and rigid in their workflows.
As technology advanced, video creation became more intuitive and widely accessible. Modern mobile apps and browser-based editors simplified the process, enabling almost anyone to create videos. However, these tools (designed for simplicity) struggled to keep pace with the growing demand for automation, scalability, and personalized content.
Today, tools like Remotion redefine video production by embracing the power of code. Built within the ecosystem of modern web development, Remotion introduces a programmatic approach to video creation. While it requires some technical expertise, it offers developers an unprecedented level of control and flexibility. By leveraging React, developers can now craft videos that are highly customizable, data-driven, and scalable (capabilities that traditional methods could never fully achieve).
What is a code-driven video?
A code-driven video is a method of video production where every aspect of the video (from animations to content) is generated using code. Unlike traditional video creation, which relies on manual editing and often struggles with repetitive tasks, code-driven videos are dynamic and can adapt to data or user inputs. This approach offers a level of automation, personalization, and scalability that conventional, drag-and-drop tools cannot easily provide.
Why does this matter now?
While simpler editing tools lowered the barrier to entry, they still fall short when it comes to automating large-scale production, personalizing each video for different audiences, or integrating with real-time data sources. Code-driven approaches bridge this gap, empowering creators and businesses to rapidly produce tailored, data-driven videos at scale.
For example:
- Personalized Marketing Campaigns: Videos tailored to individual user preferences, driven by data like names, purchase history, or behavior.
- Dynamic Data Dashboards: Visual representations of data that automatically update and render into videos, ideal for business intelligence or reporting.
- E-learning Modules: Automated video creation for online courses, adapting dynamically to new content or user progress.
- Corporate Branding: Automated video creation of branded content for internal or external communication.
- Social Media Content: Creating on-brand, engaging posts or ads for platforms like TikTok and Instagram at scale.
What is Remotion?
Remotion is an open-source React library that allows developers to produce videos through code, making video creation dynamic, scalable, and easily automated.
Imagine creating audiovisual content that responds to real-time data, such as marketing metrics, dashboards, or even personalized stories for specific users. With Remotion, this is possible—and best of all, it’s achieved using just code!
Requirements
Before using Remotion, make sure you have:
- Basic knowledge of React: Familiarity with React components and JSX is essential to work with Remotion.
- Node.js Installed: Use a stable version like Node.js 16 or higher.
- Git installed: Use a stable version, normally latest git versions are fine
Bootstrapping and understanding a Remotion project
To quickly start a new Remotion project, use the following command:
npx create-video@latestThis will open an interactive setup where you can:
- Name your project (in this case we will name it my-video).
- Choose a template (select the Blank template for simplicity).
It’s possible the interactive setup will ask if you’d like to use Tailwind CSS. For this walkthrough, we won’t use it.
After the generation takes place, the project structure will look like this:
my-video/
├── public/
├── src/
│   ├── Composition.tsx
│   ├── index.tsx
│   ├── Root.tsx
├── package.json
└── ...
Here’s how the files are structured:
- index.tsx: The main hub where all the video recipes (compositions) are registered. It tells Remotion which videos are available to create and produce.
import { registerRoot } from "remotion";
import { RemotionRoot } from "./Root";

registerRoot(RemotionRoot);
- Root.tsx: This file defines the composition wrapper for our production, think of it as a recipe for a video. Among other things it defines the size, length, and how fast the video plays, plus what content it will show.
import { Composition } from "remotion";
import { MyComposition } from "./Composition";

export const RemotionRoot: React.FC = () => {
  return (
    <>
      <Composition
        id="MyComp"
        component={MyComposition}
        durationInFrames={60}
        fps={30}
        width={1280}
        height={720}
      />
    </>
  );
};- Composition.tsx: The actual “content” of the video, works as the canvas where we can include text, images, animations, etc. It’s the creative part of the recipe where you decide what the video will look like.
export const MyComposition = () => {
  return null;
};
We will need to install the node dependencies of our new bootstrapped blank Remotion project by running
npm installAnd before finishing the bootstrap process, we will use one of the most powerful tools of Remotion which is Remotion Studio. This will allow you to see the current state of your composition from here on, letting you fine-tune your compositions quickly before final rendering. You can start this studio application by running
npm run devAfter running this command you should see Remotion Studio in your browser with a blank composition.
With this structure in place, you’re ready to start building your video compositions.
Showing something in the scene
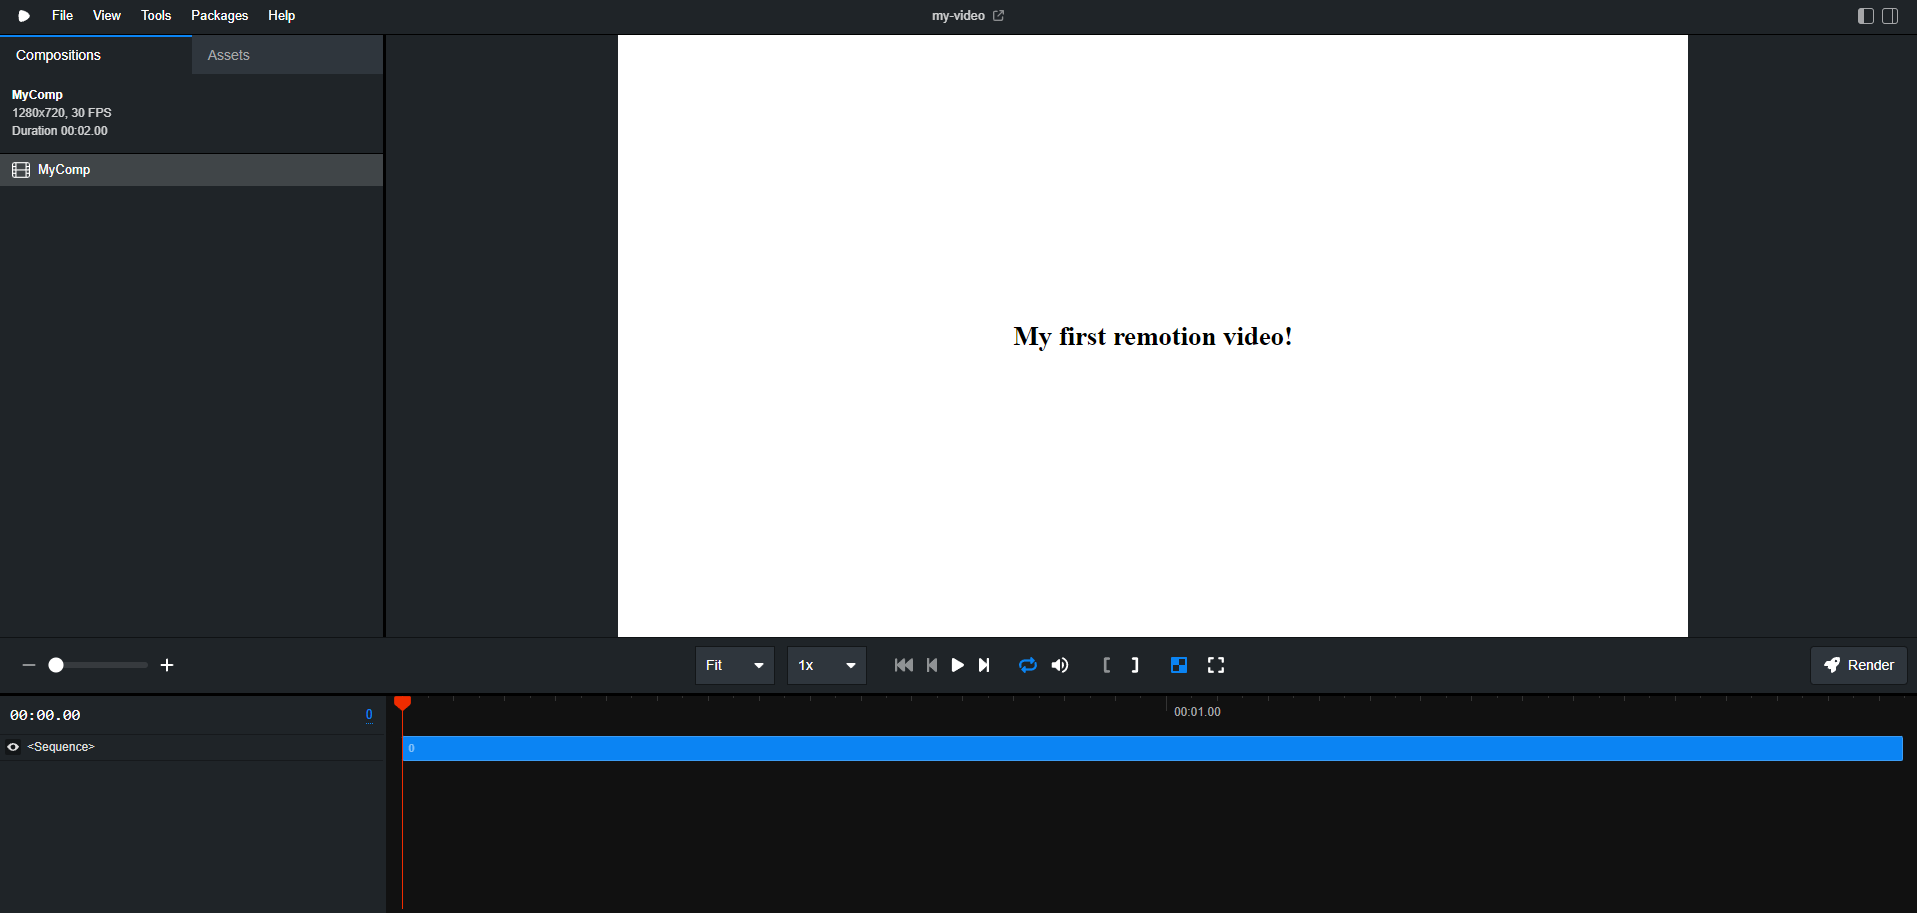
We begin by modifying our composition creating a straightforward title screen to display content without any animations and too much overhead. The goal is to get something simple up on the screen.
Composition.tsx
export const MyComposition = () => {
  return (
    <div style={{
      display: 'flex',
      justifyContent: 'center',
      alignItems: 'center',
      width: '100%',
      backgroundColor: 'white',
    }}>
      <h1 style={{ color: 'black' }}>My first Remotion video!</h1>
    </div>
  );
};
It renders a white background with centered black text.
Background music
With the title in place, it’s time to make the composition more engaging by adding background music.
You can include the MP3 file in your project and use it in the composition through the <audio> Remotion component:
1. Add an MP3 file to your working directory (can be your favorite song, let’s name it music.mp3). Place it inside an public folder in the root of your project. For example:
my-video/
├── public/
│   └── music.mp3
├── src/
│   ├── Composition.tsx
│   ├── index.tsx
│   ├── Root.tsx
├── package.json
└── ...
2. Update the MyComposition component to include the local MP3 file:
import { Audio } from 'remotion';
import backgroundMusic from '../public/music.mp3';

export const MyComposition = () => {
  return (
    <>
      <Audio src={backgroundMusic} />
      <div style={{
        display: 'flex',
        justifyContent: 'center',
        alignItems: 'center',
        width: '100%',
        backgroundColor: 'white',
      }}>
        <h1 style={{ color: 'black' }}>My first Remotion video!</h1>
      </div>
    </>
  );
};
If you take a look at Remotion Studio, the background music now plays for a few seconds while the title remains visible.
Sequences for a timeline
Sequences allow us to control when specific elements appear during the video timeline, effectively answering the question: How do I orchestrate when elements appear on the screen?. This granular timing control is especially valuable for complex projects that depend on precisely timed transitions, data overlays, or multiple branding elements.
If your composition’s fps (frames per second) is set to 30, then durationInFrames={30} corresponds to one second of on-screen time. Adjusting from and durationInFrames values lets you precisely time when elements appear or disappear.
Building upon the existing composition, we can add sequences to introduce a second scene.
import { Sequence, Audio } from 'remotion';
import backgroundMusic from '../public/music.mp3';

export const MyComposition = () => {
  return (
    <>
      <Audio src={backgroundMusic} />
      <Sequence from={0} durationInFrames={30}>
        <div style={{
          display: 'flex',
          justifyContent: 'center',
          alignItems: 'center',
          width: '100%',
          backgroundColor: 'white',
        }}>
          <h1 style={{ color: 'black' }}>My first Remotion video!</h1>
        </div>
      </Sequence>
      <Sequence from={30} durationInFrames={60}>
        <div style={{
          display: 'flex',
          justifyContent: 'center',
          alignItems: 'center',
          width: '100%',
          backgroundColor: 'blue',
        }}>
          <h1 style={{ color: 'white' }}>Blue-tiful Transition</h1>
        </div>
      </Sequence>
    </>
  );
};
After this you should notice in Remotion Studio that during the first half of the video we have the original title (first sequence), and during the second half the new blue sequence kicks in (the second sequence)

Sequences can be nested, so if you require to display multiple sequences one inside the other that’s something that Remotion supports
Tip: As your projects grow, consider breaking large scenes into smaller, reusable components. This modular approach makes your code easier to maintain and scale.
Producing the Video
Now that we have a basic composition in place, it’s time to render the video and see the result. Remotion provides a command-line tool to produce your composition into a video file. Run the following command in your terminal:
npx remotion render src/index.tsx MyComp out/my-first-remotion-video.mp4- src/index.tsx: Path to the root file containing the composition.
- MyComp: The ID of the composition defined in the “ component.
- out/my-first-remotion-video.mp4: The output path for the rendered video file.
After running this command, you will have a .mp4 video file showing the content we’ve defined so far.
Conclusion
By incrementally building on a single composition, we’ve covered the basics of Remotion by defining a root structure, rendering simple content, integrating background audio, and coordinating timelines with sequences.
This introduction only scratches the surface of what’s possible. Remotion’s advanced capabilities include integrating data from external APIs for dynamic content, crafting smooth scene transitions, embedding various media types, and exporting in multiple formats. As projects scale, developers can employ these features to produce complex, data-driven videos that update automatically and personalize content at unprecedented scale.
With Remotion, you don’t just edit videos, you compose them programmatically. This approach empowers you to create scalable, interactive, and automated video workflows that harness the full power of React and the web ecosystem. For those ready to push beyond traditional editing limits, Remotion opens the door to truly modern video production.
Further Resources
For deeper insights, explore the Remotion documentation and community examples to discover advanced techniques and best practices. You’ll find guidance on integrating external APIs, managing complex animations, optimizing performance, and working with environment variables—tools and strategies that help you take your code-driven video production to the next level.
World-class software development services
Qubika’s Platform Engineering Studio builds captivating web interfaces, harnessing HTML, CSS, and JavaScript. Collaborating with our UI/UX experts, we create visually stunning, user-friendly designs that adapt to any device or browser.


